Multitenancy
- Antoine Hage (Unlicensed)
- Michel El Hajj (Unlicensed)
Introduction
This module offers the ability to create and manage tenants and their applications as well as link these applications to productized package.
Tenants represent the clients that will interact with your services and daemons. Click here to learn more about SOAJS Multitenancy.
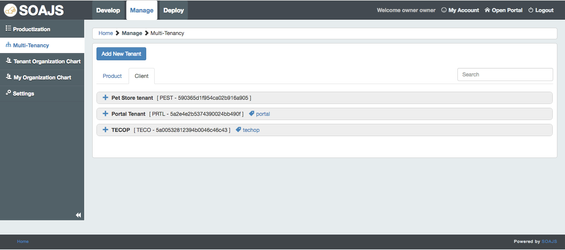
The module provides a list of all the tenants except the tenant you are logged in with. To modify the tenant you are logged in with, please head to Manage → Settings.
Tenants are divided to 2 categories:
| Category | Description |
|---|---|
| Product Tenants | Tenants that do not have users under them and their usage is more interpreted as system to system communication. |
| Client Tenants | Tenants are have users who interact with your products and are more likely used as user to system communication. |
Objective
Create & Manage Tenants
Steps:
- Create a new tenant
- Create a new application for this tenant
- Optional ACL application override
- Create Keys in this application
- Create external keys for this application
- Create custom tenant configuration for these keys
- Create a tenant with dashboard access
- Configure oAuth & Mini-URAC
Create a new tenant
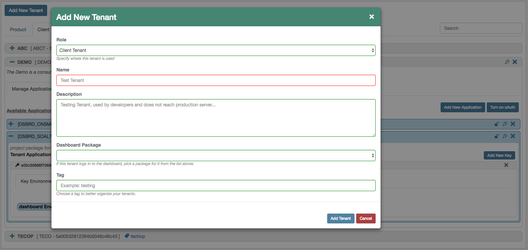
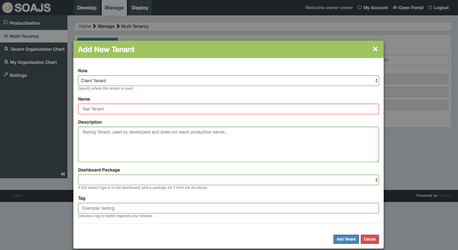
Go to Manage → Multi-Tenancy and click "Add Tenant". Here you will be prompted to create either a Client or a Product Tenant.
| Step1: Create new Tenant | Step2: List Tenants |
|---|---|
 |
|
At this stage, do not pick a dashboard package value, keep this input blank, details are explained in the below section Dashboard Tenants.
Add new application
After you create a tenant, go ahead and create an application for it.
While creating a new application, pick the package you want to it to use from productization, an optional description and a TTL value for caching.
The TTL value instructs SOAJS how long it should wait before reloading the configuration of this application.
| Step1: Create new Application | Step2: list Tenant Applications |
|---|---|
|
|
Override Default ACL
Once an application is created you will see the same lock icon you have in productization.
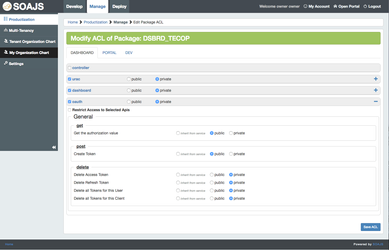
If you click this icon, a new interface will show up where you can override the default ACL recipe you created in productization for the package you assigned to this application.
However, at this level, you can only narrow down the permissions or modify them, but you cannot add to them.
Use Case:
Consider you have create a product called FRONT with a package called BASIC in it granting public access in the DEV environment to a service called quickdemo.
Then you created a tenant, an application for that tenant and while creating the application you picked this package. Your tenant application now has access to whatever this package contains.
If you choose to override the ACL of package BASIC, you will notice that under the DEV environment, you have only quickdemo service available.
At this stage, you can change the ACL behavior in DEV for quickdemo, or remove the access completely but you cannot grant access to a new service; you have to go back to productization to do that.
Generate keys and external keys
Secure your tenant and its application by generating keys and encrypted external keys. Keys are linked to applications and have additional security measures like geo, device and expiry options.
Generate Keys and External Keys
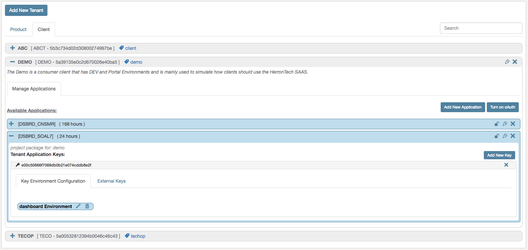
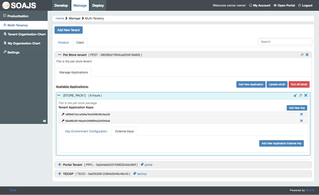
Expand the tenant application and click Add New Key. This will create an internal private key for the application and give room to generate external encrypted keys and service configuration.
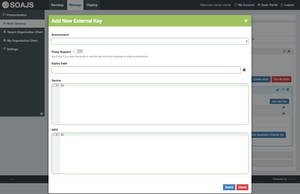
Click on External Keys Tab and then Add New External Keys. External keys are generated and encrypted using the key security phrase you have provided under the environment Registry.
While Creating an external key, based on the environment code you pick, the security phrase is loaded from the registry.
In Addition, you can:
- assign an optional expiry date if you want your external key to expire at some point or leave it blank for unlimited
- add additional security configuration such as device security and geolocation security
Click here if you want to learn more about key security and the extra layers of geo and device.
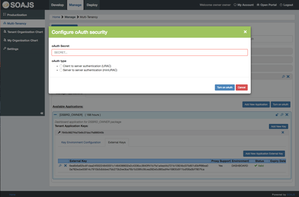
To turn on oAuth, click on Turn on oAuth button, create a secret key and choose oAuth type. Client to server authentication will add URAC login mode to all deployed environments. Meanwhile, server to server authentication will provide you with a username and password to access a server.
Copy the generated external key and place it in the header of your request before you make a call to this service and you will be able to access your service.
The following examples contains more details and samples of how multitenancy and keys work with services.
| Step1: Generate Keys | Step2: List External Keys | Step3: Generate External Key | Step4: Turn on oAuth |
|---|---|---|---|
|
|
|
|

Custom Tenant Key Configuration
Now that we have added keys to our tenant, we can instruct them to provide private configure at runtime to our services.
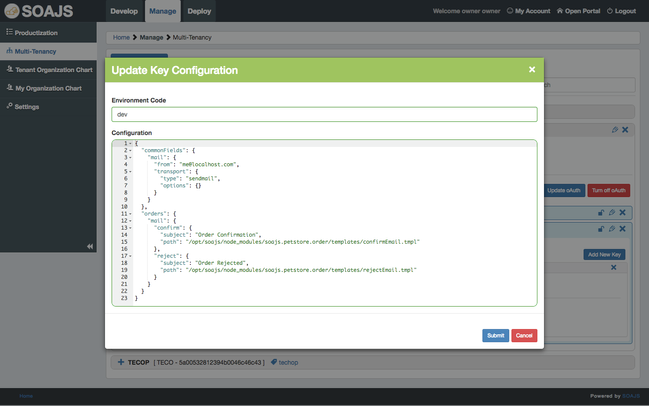
Under Key Environment Configuration tab, you see a list of grey boxes, one per environment. Click on edit and enter the configuration you want as JSON format.
When a request is made to your service, if the key of this tenant is found in the headers and if the service is deployed in the environment you entered the JSON configuration in, then this configuration gets loaded and provided as req.soajs.servicesConfig.
In this example, we added commonFields object. With the addition of this functionality, each API request using this tenant will send the data found in the servicesConfig commonFields in the headers as well the data of the service name.This will minimise the size of the header which makes the response faster.
Click here to learn more about tenant services Configuration.
{
  "commonFields": {
    "mail": {
      "from": "me@localhost.com",
      "transport": {
        "type": "sendmail",
        "options": {}
      }
    }
  },
  "orders": {
    "mail": {
      "confirm": {
        "subject": "Order Confirmation",
        "path": "/opt/soajs/node_modules/soajs.petstore.order/templates/confirmEmail.tmpl"
      },
      "reject": {
        "subject": "Order Rejected",
        "path": "/opt/soajs/node_modules/soajs.petstore.order/templates/rejectEmail.tmpl"
      }
    }
  }
}
Create Tenant with Dashboard Access
The Dashboard is an environment that is deployed upon you install SOAJS and cannot be removed. This Environment is only used to configure and manage your cloud.
This is why the Dashboard environment has a locked product in productization, and the package in this product are the only packages that can grant access to services deployed in dashboard environment.
In Addition, if you want to create a tenant who should access the operate pillar modules to work and operate on the product you have built, you need to consider that the users of this tenant will have to:
- login first to the dashboard environment
- head to /wiki/spaces/BL/pages/61906563
- switch to the environment they want to work in
- open the custom ui module
This means that the package their tenant should provide should have access to Dashboard services.
To grant access to a tenant and its users to do the above, while creating this tenant, pick a dashboard package for it.
The dashboard will then:
- Create the tenant
- Create an application for it
- Assign the package to this application
- Generate a key for the application
- Generate 1 external key bound to the dashboard environment
Packages that are available by the Dashboard Package input are under the DSBRD product in productization. You can read more about them at the bottom of the productization page.
Configure oAuth & Mini-URAC
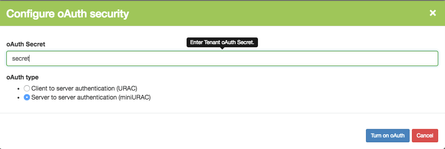
Tenants also support oAuth security, after you create a tenant, you can edit it and set a custom oAuth security phrase.
Turning on oAuth for tenants grants more security and gives room to two types of users validation: Mini-URAC - URAC v2.
Mini-URAC:
This is the default oAuth configuration for tenants, once you enter the oAuth secret phrase, click on the oAuth Users tab and you can manage oauth users.
The mini-URAC only asks for a username and a password. Then using the secret phrase you entered in the previous step, it generates an authorization value that you should use to grant access to these users.
This feature is ideal if you want other systems to integrate with SOAJS. Before making calls to your APIs, these system should login with the user you have created to the oAuth v1 product, grab the access_token they receive and add it as a query parameter along with the tenant external key to invoke the APIs of your service otherwise SOAJS will block their requests.
| Create custom oAuth Security Phrase | Manage Mini-URAC oAuth Users |
|---|---|
|
|

URAC:
This oAuth configuration instructs SOAJS that the oAuth Users are not found in the Mini-URAC and that their records are in the %TenantCode%_urac Databases based on which tenant is making the call.
These records are manageable via 3 modules in the dashboard based on their Organization Chart:
| My Administrators | These users records represent you and the other administrators of the tenant you are logged in with and are managed under My Organization Chart module. |
|---|---|
| Tenants Administrators | These users records represent the administrators of all the tenants you have except the one you are logged in with and are managed under Tenant Organization Chart module. |
| Tenants Members | These users records represent the members of the tenants you have who are not administrators and are managed under /wiki/spaces/BL/pages/61991287 module in /wiki/spaces/BL/pages/61906563 Pillar. |
To instruct SOAJS that the oAuth users are not in Mini-URAC, two steps are required:
- Edit the tenant and add the oAuth security phrase ( similar to Mini-URAC )
- Edit the Services Configuration of the tenant (look above for section Custom Tenant Key Configuration ) and for Each environment add the blow code snippet.
//oauth services configuration
"oauth": {
	"loginMode": "urac" //tell oauth that the users are in urac not mini-urac
}
Enter the above JSON object using the editor of Custom Tenant Key Configuration and you are done!
Now when the users of this tenant invoke the login of oAuth v1 service, SOAJS will compare the credentials to user records of %this tenant code%_urac database. If the user is found and the credentials match, it will generate access and refresh tokens for him.